Setting up Groups and Stages in Contacts
Why set up Groups and Stages?
This is required if your company's business processes differ from those configured in Smarty CRM by default.
You can:
- edit stage names;
- change descriptions;
- set other colors;
- add attachments;
- customize field templates.
Video
How to Set up Groups and Stages?
You must be the workspace administrator.
- Go to the group settings:
- hover over the group;
- select Pencil.
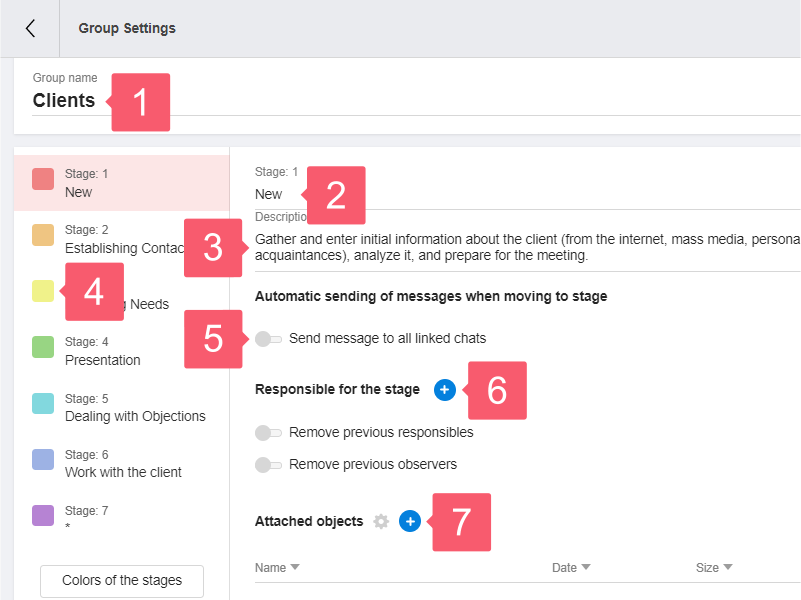
- Configure the following items:
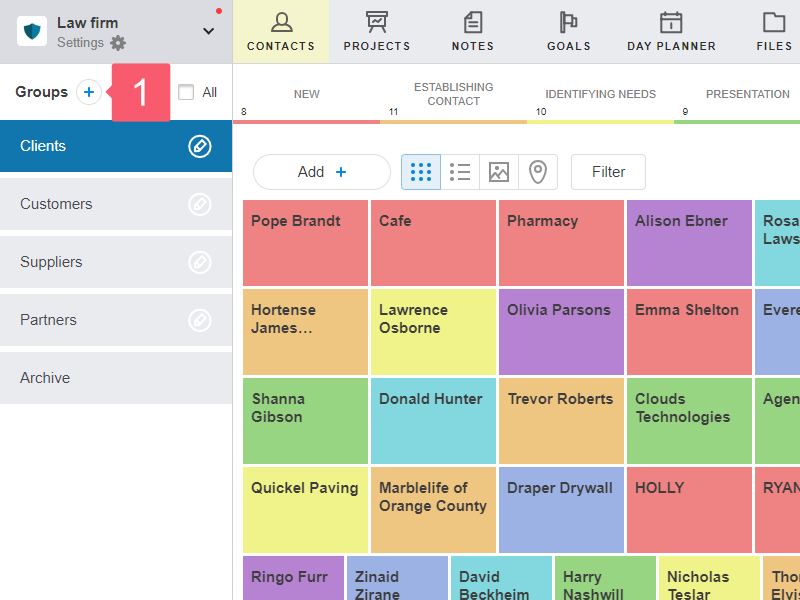
- the name of the group (1);
- stage parameters: name (2), description (3), colors (4), automatic sending of messages when moving to stage (5), responsibles for the stage (6), attachments (7);
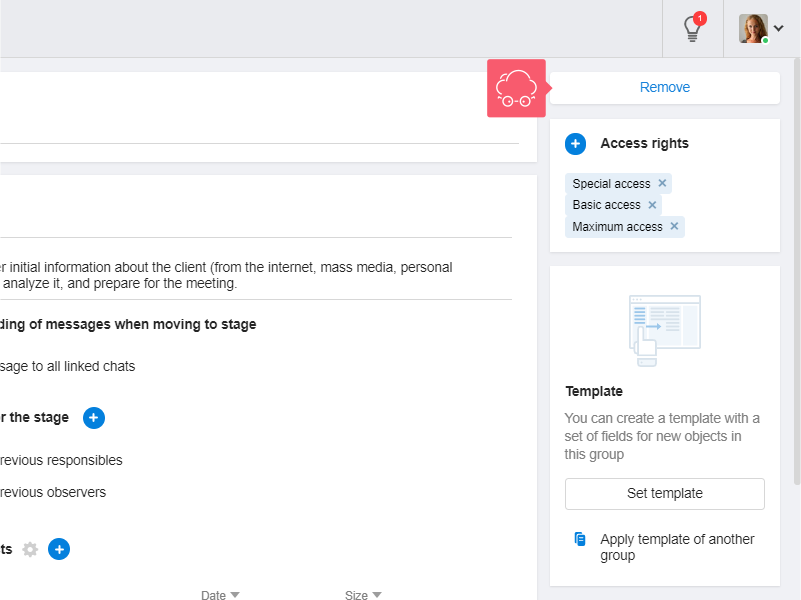
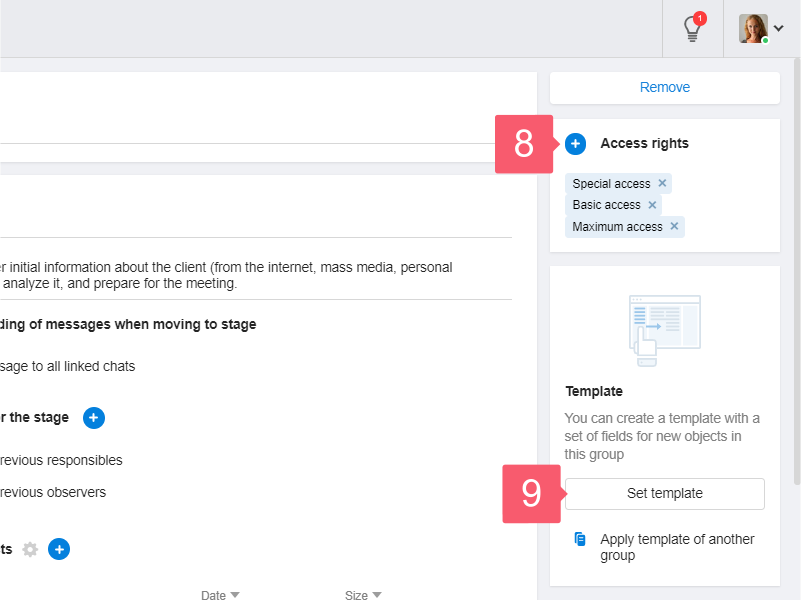
- access rights (8);
- field templates (9).
Learn how to automatically assign responsibles for the stage.
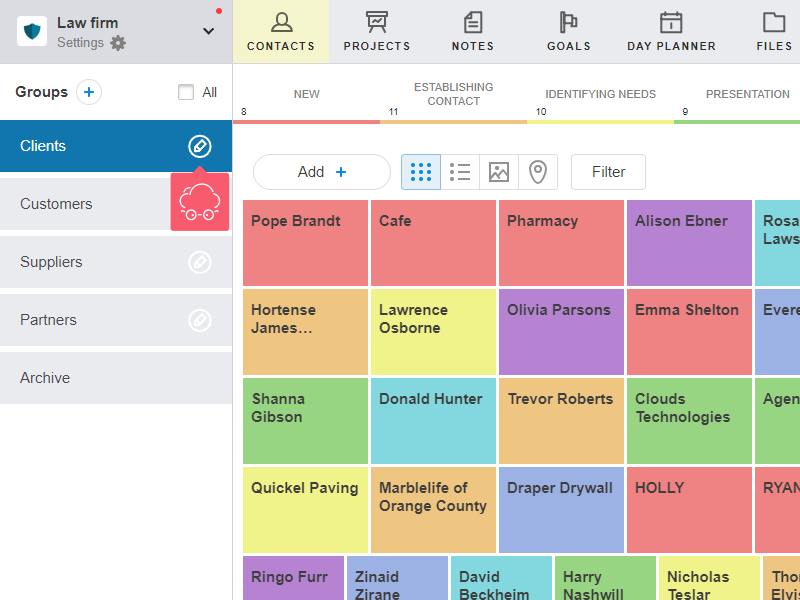
How to Add a Group
You must be the workspace administrator.
- Find Groups in the area on the left and click Plus.
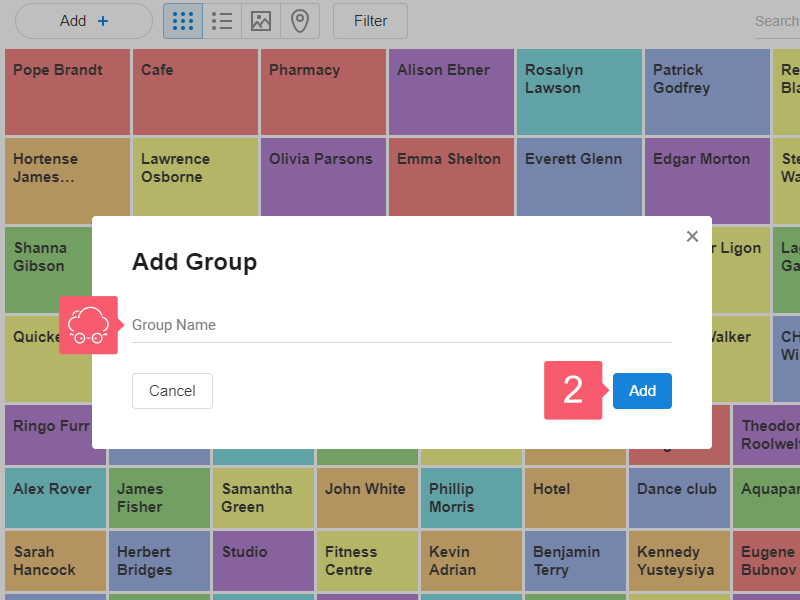
- In the window that opens, enter the name of the group and click Add.
The new group appears at the end of the list.
How to Swap Groups?
You must be the workspace administrator.
The group is moved by dragging with the mouse:
- click on the group with the left mouse button and hold for a second;
- move the group to another place;
- release the button.
How to Remove a Group?
You must be the workspace administrator.
- Go to the Group Settings.
- Click Remove.
Objects from the removed group will be moved to the Archive.